|
||||||||
| |
|
|||||||
| |
|
|
||||||
| |
|
|
|
|
|
|
|
|
| |
||||||||
| |
||||||||
| |
|
|||||||
| |
|
|
||||||
| |
|
|
|
|
|
|
|
|
| |
||||||||
Solution:
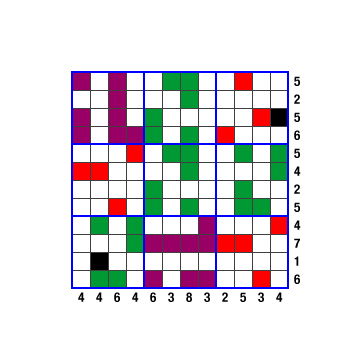
Detailed Solution:
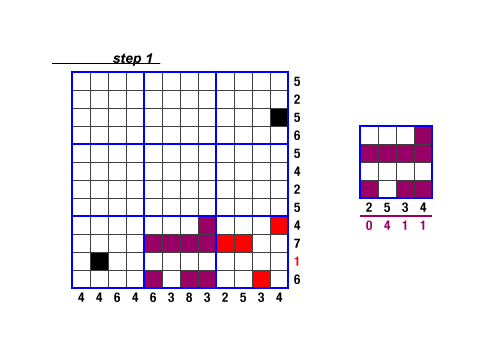
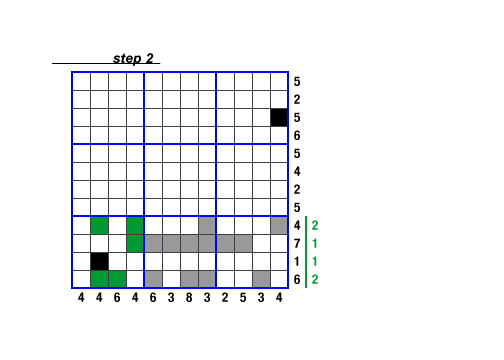
Let us first examine the bottom horizontal tier of blocks, which has a row totaling one. That one shaded square is already used by the hint, and thus Stamps 1 and 3 must be used in the other two blocks to keep that row of squares open. Working through various combinations of Stamps 1 and 3, only one such combination works. If Stamp 3 were to go on the right, we would end up with an unacceptable combination of squares left over to be shaded in the right vertical tier of blocks, thus Stamp 3 must go in the middle.
Working horizontally in the bottom tier of blocks, only one orientation of Stamp 2 fits in the left block and shades the given hint square.
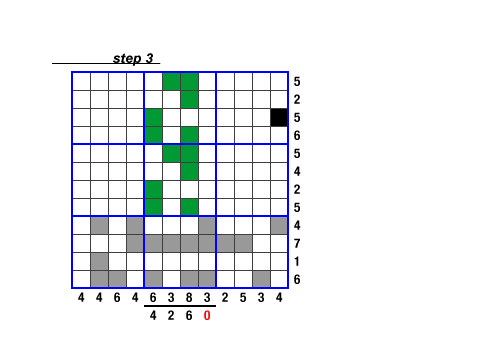
In the middle vertical tier of blocks, the right-most column already has the required three shaded squares. This means that two copies of Stamp 2, leaving the right column of squares empty, must be used.
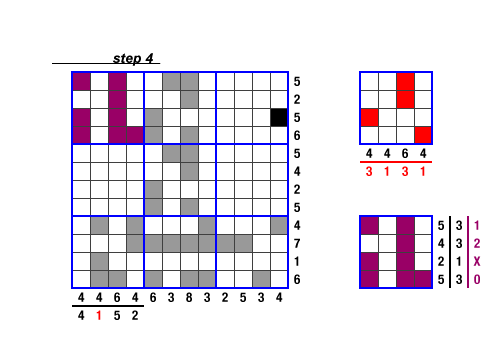
In the left vertical tier of blocks, subtracting off those squares already shaded in the bottom block, one column only has one square left to shade. Thus Stamp 1 or 3 will need to be used to leave that column open. Stamp 1 does not leave an acceptable combination of squares left to shade, thus Stamp 3 must be used. If Stamp 3 were used in the middle block, there would be too many squares shaded in one row of the middle horizontal tier. Thus, Stamp 3 must be in the top left block.
Working horizontally in the top tier of blocks, Stamp 1 can be used in the right block. Then working vertically in the right tier of blocks, Stamp 2 can be used to fill the middle block. Then working horizontally in the middle tier of blocks, Stamp 1 can again be used in the left block. In this method of solving the puzzle, the second shaded hint square is unnecessary, although it can be useful if solving the puzzle by beginning with the right vertical tier of blocks.
Last updated: May 26, 2003
Copyright © 2000-2003 All Rights Reserved